Launching the JupyterHUb AMI in EC2
- Log in to AWS with a user with administrative privileges
- Navigate to the JupyterHub AMI listing on the AWS Marketplace
- Click
Continue to Subscribe -
Click on
Accept the Terms(it might take 1 or 2 minutes for AWS to accept the offer).Note that there is no charge for subscribing to this offering only when launching an EC2 instance.
-
Once you are subscribed click
Continue to Configuration - On the
Configure this softwarepage, select the AWS region where the EC2 instance will reside and clickContinue to Launch -
On the
Launch this softwarepage, you can configure theInstance type,VPC,subnet,Security Group, andkeypairYou can also select
Launch through EC2underChoose Action, to use the regular EC2 flow -
Finally click on
Launch
Now go to the EC2 Dashboard and locate the recently launched EC2 instance.
Copy the public IP address and open it in a browser and you should now see the JupyterHub UI.
Note
Note that the UI might take a couple of minutes to start the first time
while it's configuring the services and creating the first user.
Also, be sure to use HTTP and not HTTPS.
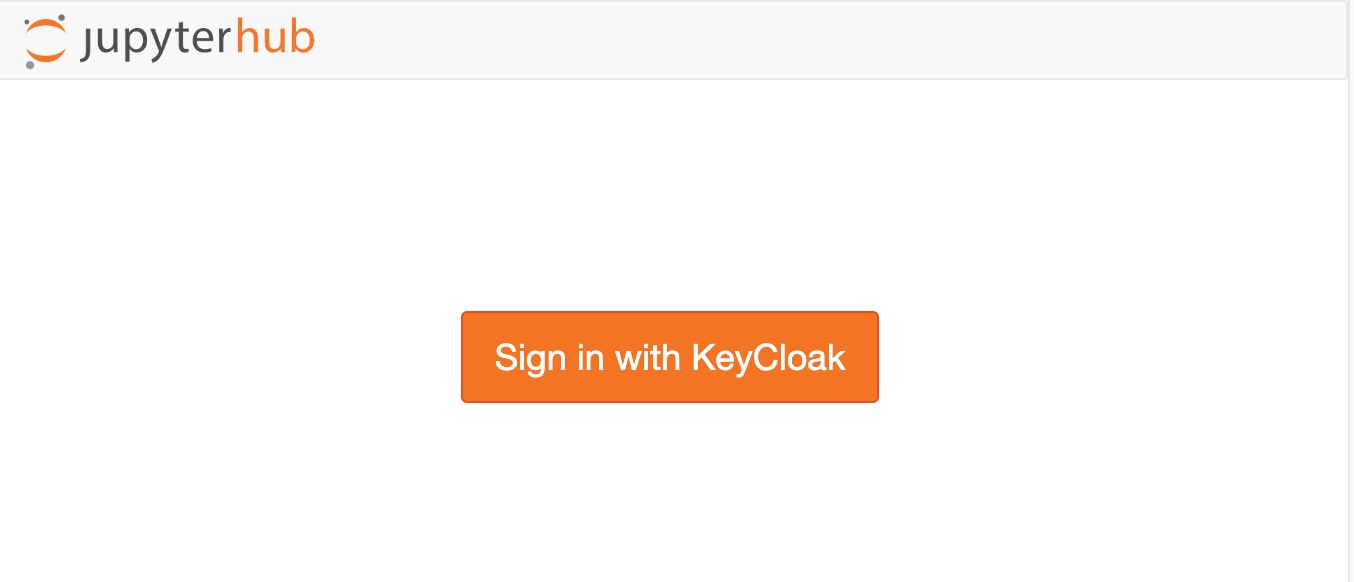
Accessing JupyterHub
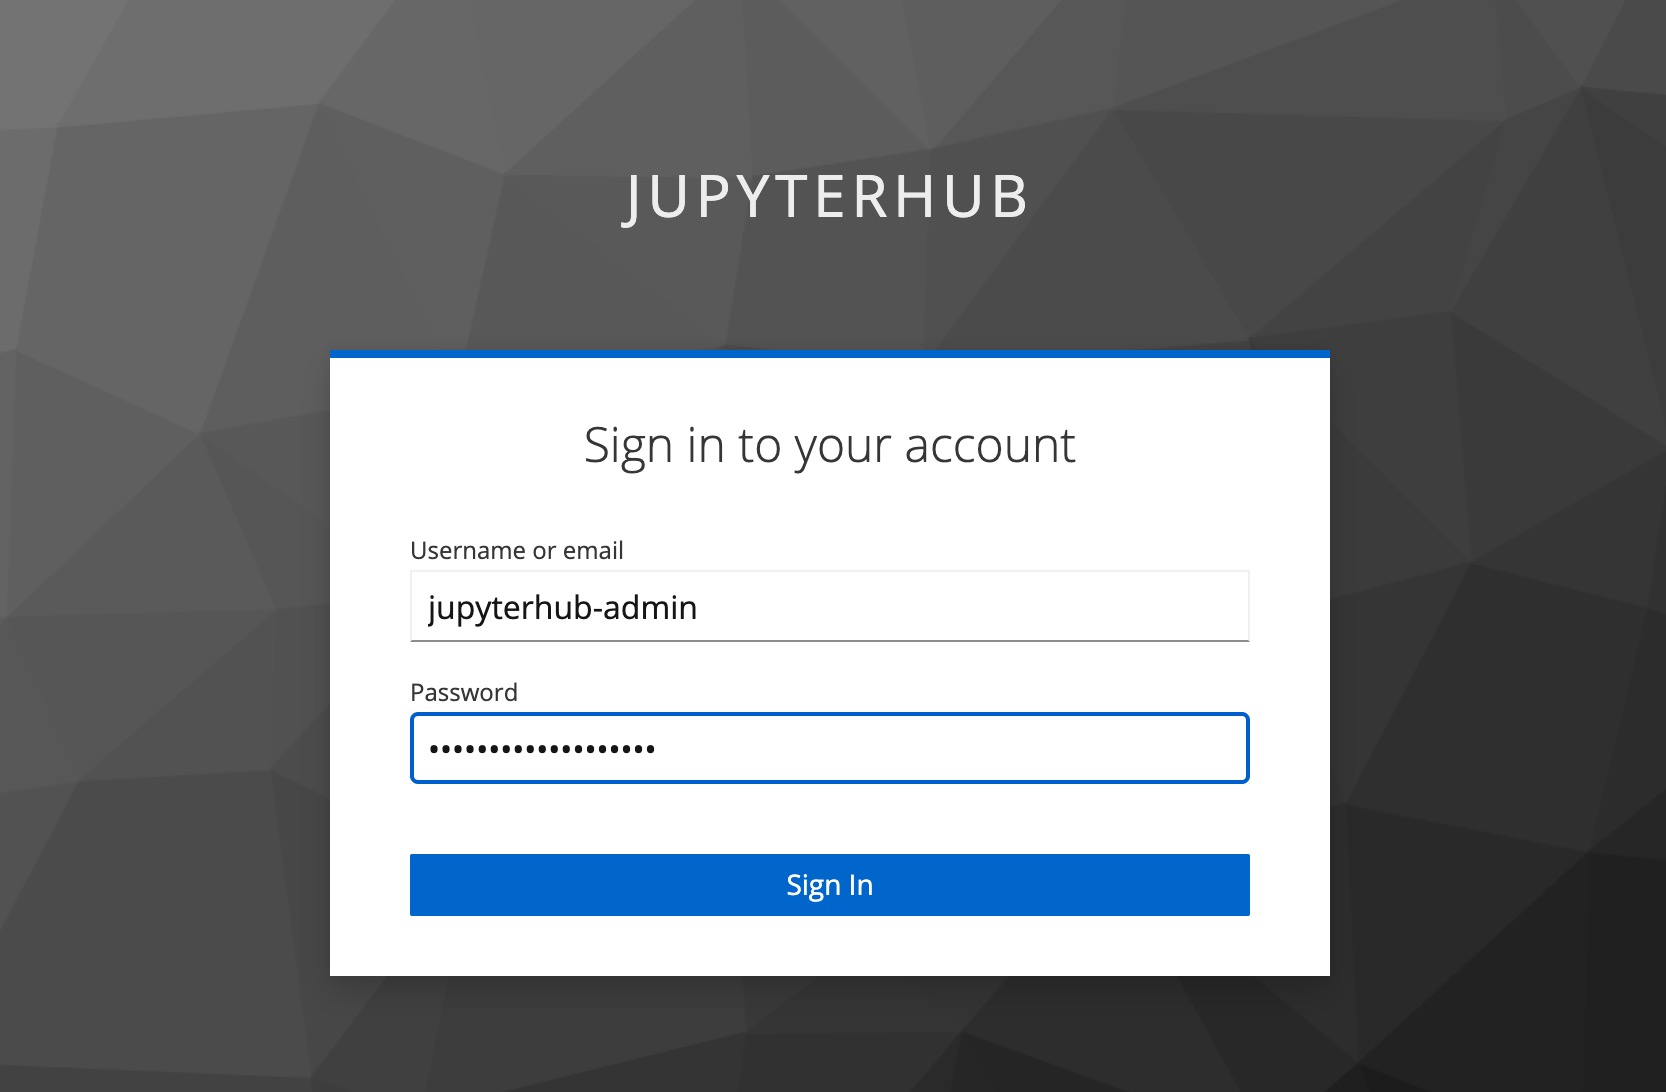
After clicking Sign in with KeyCloak you will be sent to KeyCloak where you
can log in to JupyterHub using the default user:
- Username:
jupyterhub-admin - Password: Instance ID of the EC2 instance, for example
i-0b3445939c749244c
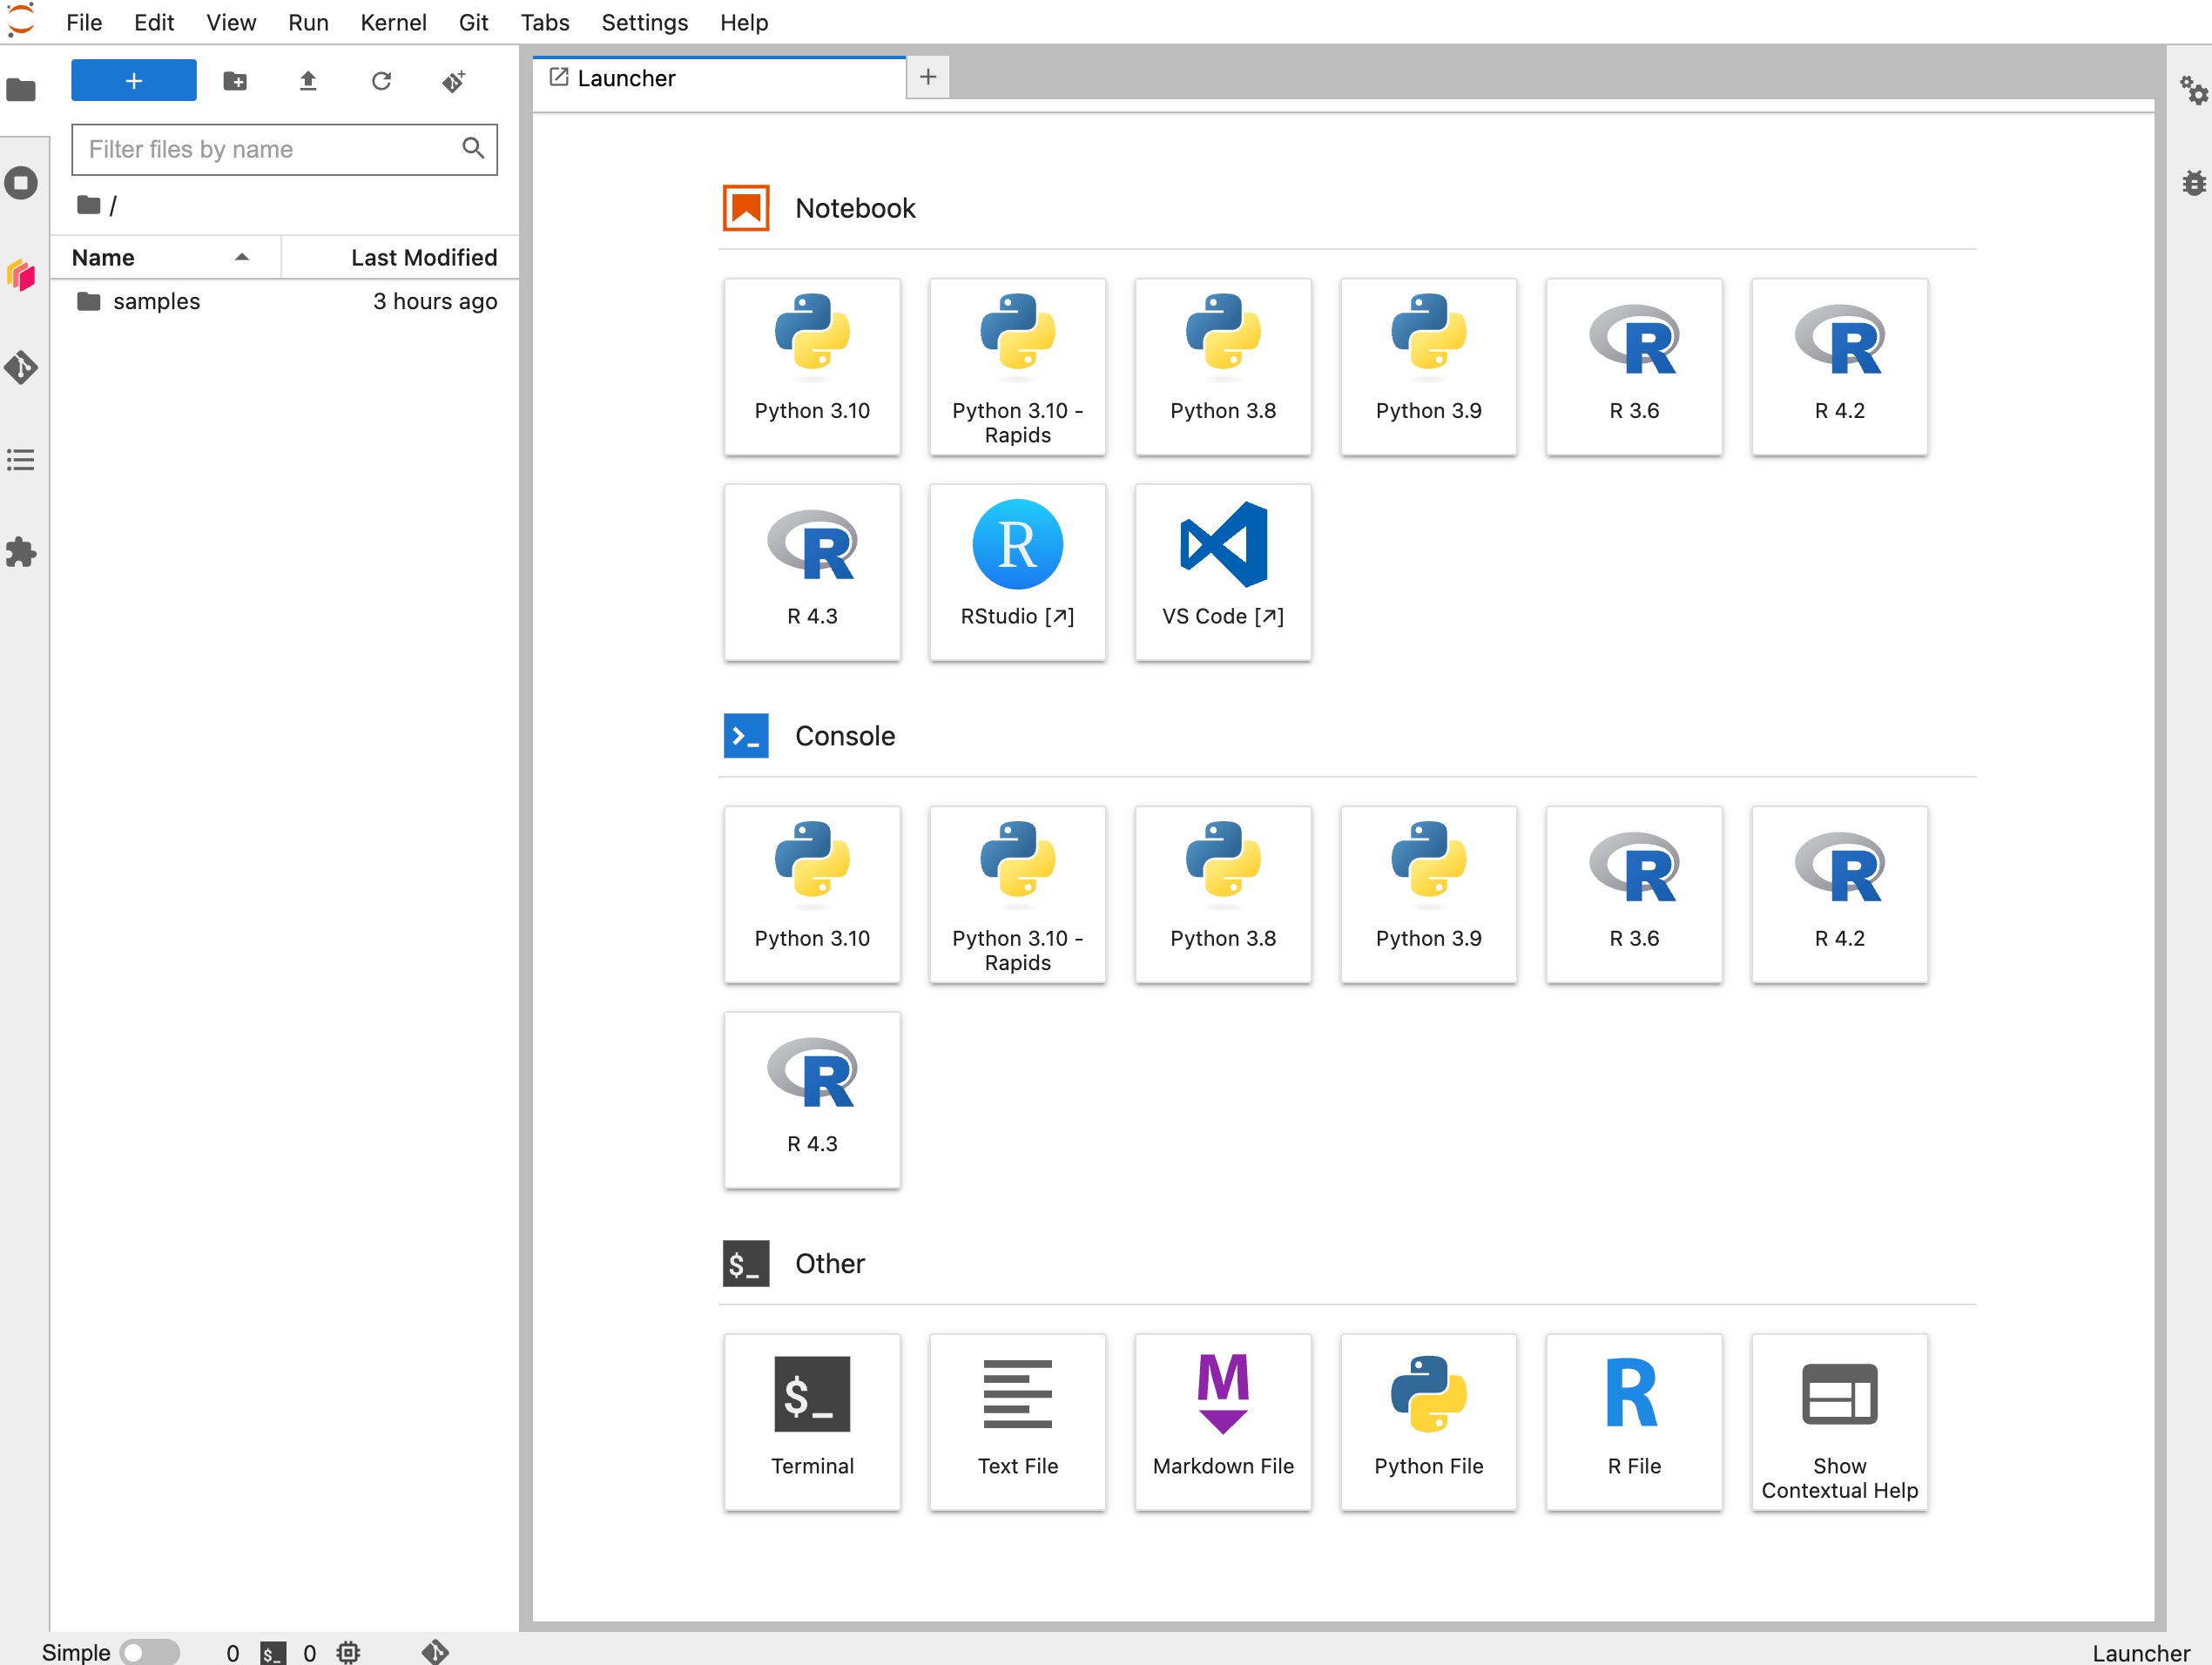
You will now be redirected to JupyterHub and your Jupyter session will start, you will now see the Jupyter Lab UI.